Sunday, December 28, 2014

Pigs in a Blanket - Low Carb & Keto friendly Recipe

If you like beef and cheese these little guys are going to be your favorite! 
 Since they are bite size they are perfect for game day treats!


Pigs in a Blanket


What You'll Need: 

1 1/4 Cup Mozzerella Cheese
7 Tbsp Almond Flour
1 Tsp Onion Powder
1/8 Tsp Garlic Powder
1/8 Tsp Ground Mustard
1 Egg
30 - 45 Nathan's Cocktail hot dogs

What You'll Do: 

1) Melt Mozzarella cheese in the microwave for 2 minutes at 30% power.
2) Combine almond flour, onion powder, garlic powder & ground mustard in a bowl. 
3) Add the flour mix and egg to the melted cheese. Mix well. 
4) Press and fold the dough with a spatula until most of the ingredients are combined. 
5) Reheat for another 10 seconds, then press and fold dough until its all mostly one color. 
6) Reheat mixture for another 10 seconds. 
7) Preheat oven to 400 degrees.
8) On a piece of greased (I use a stick of butter here) parchment paper, roll or spread out the dough with a spatula into the shape of a large rectangle. 
8) With a pizza cutter cut about 1 inch by 2 inch rectangles into the dough..
9) Place a cocktail hot dog on the 1 inch edge of the small rectangle you just made. Roll the dough around the hot dog. Repeat until all the dough has been used. 
10) Place in the oven to bake for 15 - 17 minutes. You know when they are ready because the dough will be lightly browned. 

I served these as  a side with chili! 
This batch makes a bunch so there were a few to snack on later.


Friday, December 12, 2014

Low Carb Breakfast Pizza...

yes...it's REAL!

My husband loves the breakfast pizza from Casey's General Store in Iowa. Whenever we visit my mom makes sure to order at least one :) . After coming across an amazing low carb dough recipe from uplateanyways, I knew it was the perfect base to springboard from and make this pizza for my hubby. I'm kind of elated to report I put together a recipe that hit the spot for him and now its time to share it here with you. Alright, let's get to it!


Low Carb Breakfast Pizza
Serves 3 - 4
Pin for later here.

What You Need: 
- Large Pan
- Parchment Paper
- Stick of Butter to grease parchment paper and glaze dough
- 1 1/2 Cups Shredded Mozzarella Cheese
- 1/2 Cup Cheddar Cheese
- 7 Tablespoons Almond Flour
- 1 Teaspoon Onion Powder
- 1/8 Teaspoon Ground Mustard
- Dash Garlic Powder
- 4 oz Ground Turkey Sausage 
- 4 Eggs
- 1 Slice Bacon Chopped
- 1/2 Cup Cheddar Cheese
salt and pepper to taste

What You'll Do: 

1) Preheat oven to 400 degrees.

2) Melt 1 1/4 cups mozzarella cheese in microwave for 2 minutes at 30% power. 

3) Combine almond flour, onion powder, ground mustard, garlic powder and 1 egg. Mix well.

4) Add the mix to the melted mozzarella and mix well. Folding the cheese over itself seems to really help work this batter up! Mix with your hands if you want here - get into it! :)

5) Once the mixture is combined, place mixture back in the microwave, reheat for 10 seconds. Mix again until the mix is mostly one color.

6) Size up a piece of parchment paper to fit the pan you'll be using. Take a stick of butter and grease the parchment paper. Set butter aside.

7) Roll dough out on parchment paper with your hands or spatula into a circle.

8) Place in oven for 7 minutes.

9) While the crust is baking, in a medium sized pan break up the sausage, put in bacon pieces to cook as well. Remove from heat once all pieces are browned.

10) Now whisk the 3 remaining eggs and scramble them over low medium heat in  a small pan. Pay close attention to the eggs so they stay fluffy. Remove from heat just before they are done.


11) After 7 minutes, pull crust from the oven, take the stick of butter and glaze the top. 

12) Sprinkle 1/4 cup cheddar cheese across the entirety of the crust. Now add the eggs and meat, spreading them sporadically across the crust. Add the remaining 1/4 cup cheddar cheese to the top, as well as the 1/4 cup mozzarella cheese. Salt and Pepper to taste.


13) Place back in the oven for 5 more minutes until the cheese has melted.

14) Slice and serve warm!


If you try this I would *love* to know! I'm very excited to share it as I've been hoping to for some time but wanted to get it "just right". I hope it paid off! Please feel free to leave comments below! 

Thank you and enjoy!

Tuesday, November 4, 2014

Halloween is over BUT... Pumpkin Seed recipes are completely necessary!

And so...I still must tell you about the feast we had before we carved pumpkins on Halloween Eve!
We carved up some pumpkins too! You might ask yourself, what did we do with the leftover pumpkin seeds?! Why bake them of course!! :D We had a total of 4 large pumpkins that yielded two full pans of pumpkin seeds to roast! They were delicious! Why is there only one time of year you can get these seeds? I hope this changes :). I have a mind to go out next grocery run and grab pumpkins to make my own pumpkin puree and stock up (if even a little) on the pumpkin seeds. I make no promises though, as sometimes my ambitions outweigh the hours in a day ;).


I had made Low Carb Chili, (which I neglected to take a photo of :(  ) and Keto Chocolate Roll earlier in the day...(with coffee!!! ^-^)


...so it was all ready to go and add to the festivities! The chili was a recipe I've used for years now, the spices always make my nose run and kick me in the throat causing me to cough, but I will still vouch for it being a recipe worth making! With 5 adults in the house, the chili was gone. Lol No leftovers here! However, this was the first time I had made the chocolate roll, I didn't really know what to expect... it turned out to be quite magical! Tasty and fluffy and yummy!


Baked Pumpkin Seeds


What you will Need:
- 2 Large Pumpkins with Seeds
- Olive Oil
- Sea Salt
- Colander
- Cookie Baking Sheet

What you will Do:
1) Hollow out the pumpkin carefully with a large Tablespoon.
2) Separate the pumpkin seeds from the pumpkin pulp. 
3) In a colander, place the the pumpkin seeds and rinse. 
4) Preheat oven to 350 degrees. 
5) Place the seeds in a medium bowl. 
6) Add 3 Tablespoons Olive Oil for every  3/4 cup of seeds, and 1 Teaspoon of salt. 
7) Mix it all up and place on a cookie sheet, spread them in a single layer. 
8) Bake at 350 for about 20 minutes, pull out the pan, stir them and place back in the oven for about 15 - 20 more minutes. 

Enjoy these! They only seem to happen about once a year! Serve them hot or cold. The smell reminds me of popcorn! How delightful! ^-^ 


Friday, October 24, 2014

Meatloaf - Keto & Low Carb Friendly

Temps are dropping here in Texas.. which means its time to break out the casserole dish! 
Who doesn't like meatloaf?! I confess... I didn't used to. The kind I tried growing up was too tart for my taste. My guess is because ketchup was used, I love ketchup but the store bought kind was too sweet (I since have taken to making my own ketchup ;)). I like my meat salty. 
Even when it comes to ham. I'm not for a honey baked ham, add veggies to it for me please! :) 
In any case, this meatloaf is my kind of meaty goodness made with spiced homemade ketchup, which for this recipe, we'll call red sauce. 
Using a 9 x 13 pan there wasn't much to speak of as far as leftovers go! Which is fine, to me that means everyone got fed and got enough. :) Though I'll admit sometimes I try making a huge batch of something hoping for leftovers later! ^-^ I like cooking/baking but sometimes I'd like to just grab something from the fridge and 5 minutes later have a warm meal in front of me. :)


Meatloaf

What You'll Need:

Base of Meat Loaf:
2 lbs of ground beef
1 lb ground pork
2 Tablespoons Coconut Flour
1 Cup Diced White Onion
8 Cloves Minced Garlic
1/2 Cup Zucchini Diced or Shredded ( I dice it, every time )
3/4 Cup Red Sauce (see below)
1 Egg Beaten
1 Teaspoon Salt
1/4 Teaspoon Pepper

Red Sauce:
6 oz Tomato Paste
3 Tablespoons Vinegar
1/4 Teaspoon Dried Mustard
1/3 Cup Water
1/4 Teaspoon Cayenne Powder
1/2 Tablespoon Garlic Powder
Splash of Lemon Juice

To Grease Pan: Bacon Grease

What You'll Do: Preheat oven to 350 degrees.
1) Combine all ingredients (less the red sauce) in a bowl. Mix well.
2) In a separate smaller bowl, combine all ingredients for red sauce. After mixing the red sauce, take about 1/2 of it and add it to the meatloaf mixture.
3) Use the bacon grease to grease a 9 x 13 pan. Add The Meatloaf mix to the pan, smoothing top of it until mostly flat.
4) Top with remaining Red sauce.
5) Bake at 350 for 1 hr 30 minutes.

SIDE NOTE: Your meatloaf may "shrink". This is normal. 
The leaner your meat, the less it will shrink. Just FYI. :) 

Serve warm and enjoy!


Monday, October 20, 2014

Ground Pork & Green Bean Stew - Low Carb & Keto Friendly


I do the grocery shopping for my family, I make a list every week in an effort to only ever make one trip. And by one trip I mean to Costco, then to Walmart or HEB depending on what the need is. The trip doesn't take very long... about an hour and a half to two hours and I'm usually back home so long as I don't dilly dally. For the most part, this plan works. Since we've moved to Texas and there are still a few moving parts to juggle that aren't usually there once you've settled into a new place I'm not 100% on my game. Which brings me to this past Sunday. I had aspirations of trying a few recipes from my pinterest board, but in perusing my fridge and cupboard came up short in ingredients, not enough mozzarella cheese for one recipe, not enough . Which was kind of a buzz kill lol :). But once I took inventory of what I DID have, well... a problem turned into an opportunity! An opportunity to be creative and make something delicious! I have 3 other adults in my house besides me, so, when I say I hit a home run with this soup I only say that because everyone liked it, A LOT. So much so, that it was gone the same day I made it. Yup. True story. Enough chatting from me though - lets get to the good stuff shall we? 


Ground Pork & Green Bean Stew
Pin it for later here.
What You'll Need: 

1.5 lb Ground Pork Sausage 
SIDE NOTE: I used breakfast sausage, if you get regular pork, 
add 1/4 Tsp Red Pepper Flakes to your recipe
2 Cans Green Beans
6 Cups Chicken Broth
2 Tablespoons Bacon Grease
1/2 Tsp Minced Garlic
1 Tsp Pepper
1/2 Tsp Garlic Powder
1/4 Tsp Ground Sage
1/4 Tsp Ground Mustard
1/4 Tsp Onion Powder

Optional:
- 1 Tablespoon Gelatin Powder ( I add this for the health benefits more than just the taste ;))


What You'll Do:

1) In a large pan, brown the pork.
2) While the pork is cooking, add all the other ingredients to your crock pot and set to high.
3) Once pork is browned, soon it into the crock pot.
4) Leave on high for 2 1/2 hours to let the flavors blend. You could simmer this on low all day as well and eat from it on a lazy weekend day. 

As soon as the soup is to the temperature you like it you can eat it, however the longer it sits the more the flavors have a chance to blend. This recipe would be perfect for a rainy day, or a cozy/lazy weekend. Once it's boiled at least once you can turn that puppy down to "keep warm" and let 'er simmer all day. This stew would also be a great substitute for when your family has come down with a cold. The chicken stock and the bit of pepper/garlic that's in it helps get your nose running! :D

If you are wondering what those *biscuits* are in the photos - they are none other than UplateAnyways' Almond Flour Cheddar Biscuits! Find recipe here.


 I hope you like the recipe and that it's as much of a hit with your family as it was with mine! Thank you for reading! Remember to share the health! ;)

Sunday, September 28, 2014

Doctored Stock - For Cold/Flu Season or as an Everyday Drink!

I came down with a cold a few weeks ago. I'd say the best thing I did for myself during that time was grab a box of chicken stock from the grocery store. I heated it up in a cup and savored it like I would tea, but chicken stock has much more body to it and a cozy factor that can't be duplicated with tea or coffee...so once it was gone I was kind of bummed. Since then, I'm back to good health and grabbed a large box of chicken broths from Costco . Initially I was concerned that I wouldn't use them all by there expiration date, but that was a week ago now and I've already used 2 1/2 of the 12 cartons. I'd say I have nothing to worry about after all ;). Especially since drinking copious amounts of water in a day doesn't help me stay hydrated, so increasing my intake of sodium will help alleviate that - ergo, chicken stock replacing tea.
I love this stuff, I've doctored it up a bit to suit my dietary needs. If you need more fat, a bit more protein, more collagen and a reason to have veggieless soup (no veggieless is not a real word ;)) drink this! It's minimal prep time too! 
Doctored Stock

What you Need:
1 cup Stock of Your Choice
1/2 Tablespoon Gelatin
1/2 Tablespoon Butter
Sea Salt to taste 
What you'll Do:
1) Heat stock in microwave for 45 seconds.
2) Remove stock from microwave and add gelatin slowly as it will want to clump, stir well. Add butter and salt if you're exercising this option, mix well. 
3) Put cup back in microwave for 15 - 20 seconds. 
4) Enjoy!

In case you wanted more reasons to add gelatin to anything...
According to Nourishing Traditions and the Weston A. Price foundation, there are various health benefits to Gelatin, including:
1. Can improve digestion since it naturally binds to water and helps food move more easily though the digestive track.
2. Good for joints and can decrease pain associated with arthritis.
3. Can help tighten loose skin. I get questions all the time on how to do this! CLICK Here for information on how to do it from Maria Emmerich of MindBodyHealth! 
4. Supports skin, hair and nail growth.
5. Great source of dietary collagen, therefore it helps reduce cellulite! 
6. Speeds wound healing: Gelatin is mainly composed of the amino acids glycine and proline, which many people don’t consume in adequate amounts as they are found in the bones, fibrous tissues and organs of animals and as a population, we don’t consume these parts as much anymore. These amino acids are needed not only for proper skin, hair and nail growth, but for a healthy immune function and weight regulation! Glycine, which makes up about 1/3 of the amino acids in gelatin powder is anti-inflammatory and evidence is finding that it can help speed wound healing.
7. Helps with sleep: Glycine in gelatin can also help improve quality of sleep.
8. Balances hormones: We are living in a “Sea of Estrogen” (yes, even men!), which can be caused by consuming alcohol, excess carbohydrates, hormones in food, phytoestrogens in soy, xenoestrogens found in plastics, heating food in plastic, even soap is estrogenic. This hormonal imbalance causes aging, inflammation, and infertility. Gelatin has anti-estrogenic effects which can help offset the effects of excess estrogen in the body.
9. Weight Loss: It boosts Human Growth Hormone production and boost metabolism. The largest surge of Human Growth Hormone is 30-70 minutes after bed


*****

As with all advice or information I post though - I encourage you to do your own research too! Everyone is at a different place in their way of eating and you need to find what works for you. 

Thursday, September 25, 2014

Chocolate Fat Bomb and Links to Other Fatty Goodness!

MMMMMMMMmmmmm Fat...

Seriously eat it. It's good for you! 
Don't believe me? 
Read this...

And if you're still not convinced there is something to be said for doing your own research ;). 

As a quick sidebar to this recipe, when I was little I used to eat butter by the stick. It's true. I once mentioned this to a manager I worked with and he said that makes sense why I'm so smart. You *need* fat for a healthy brain! You're only about 20 minutes from experiencing how good it tastes too! (as if I really needed to tell you that ;))


Chocolate Fat Bomb
Serves a generous portion for 1
*Can also be poured into an ice cube tray for bite size options!*
Pin it for later here.

What you Need:
- 1 Tablespoon Butter (the softer the better!)
- 1 Tablespoon Coconut Oil
- 1 Tablespoon Swerve (or Truvia)
- 1 Tablespoon Unsweetened Cocoa Powder
- 1 Tablespoon Peanut Butter (or nut butter of your choice, I use Almond Butter sometimes as well!)

Here I made two servings! One for me, one for my sister! :)
What one Serving looks like before mixing.
What you'll do:
1) Mix all ingredients in a small bowl until smooth.
2) Place bowl in microwave for 20 seconds until oil or butter are mostly melted.
3) Grab bowl from microwave, note: it may be hot. 
4) Place bowl in freezer until solid, about 30 minutes should suffice.
5) Pop out the chocolate brick by scoring the edge with a spoon or knife, pushing along the sides with a spoon.
6) Enjoy like you would a candy bar without the sugar crash side effect ;).


The nut butter and the swerve provide a bit of grittiness and substance to this, so its tasty and fun to eat! I normally grab a napkin and hold onto the side of the chocolate as I eat it, it melts slightly at my fingertips as I near the last few bites. Fat melts people! ^-^ Be prepared! :D

Here are a few other fat bombs if you want to give them a try that aren't made with chocolate. ;) Options are gooooooooooood. :)


Which one will you try first?! Enquiring minds (like me! :)) want to know!

Tuesday, September 23, 2014

Easy Green Salad - Popeye approved! ;)

So you have a protein in your meal all planned out... be it a burger, a brat, bacon or chicken... but what to do for a side? Hmmm.... think, think, think!

*Mental Light Bulb On!*

If you have (at least!) these 3 ingredients on hand, you're going places!


Easy Green Salad

What you'll Need:
- Spinach
- Pickles
- Cucumbers
- Dressing of Choice

Optional to add:
- Shredded Mozzarella Cheese

What you Do:

1) Grab a handful or two of the nutritious green spinach and add that to your plate.
2) Rinse off that crunchy cucumber you got from the grocer and then cut at least 1/3 of that puppy up and add to the mountain of green spinach on your plate!
3) Find the jar of pickles in your fridge and chop up about 2 tiny ones (or 1/2 a large one) letting the pieces fall liberally on top of the spinach and cucumbers.
4) Add your dressing and enjoy that goodness!

See? Pretty easy right? ...and yummy! That's why I share it with you! ;) Enjoy!

NOTE: If you need a way to get more veggies in your picky eaters diet this should do the trick! I only say that because my husband is not a fan of veggies in the least but he'll eat this! 
Good luck! :)

Sunday, September 21, 2014

Easy Cobb Salad

In Texas, I'm kind of slow to get to the kitchen to cook/bake these days, I don't want to add any heat to the inside of the house. Our grill did move here with us (yay! :D) but it's not set up to be easily accessed at the moment. You work with what you have sometimes. :) This recipe just kind of happened the other night, I followed a craving, what can I say? :) I didn't necessarily know this is what it would turn out to be, but I'm so glad it did! This is minimal cooking and you get a bunch of delicious goodness by way of the veggies here. Get it! Get it!

The flavor packs a punch! I don't always have time (or the desire ;)) to make hard boiled eggs or ham that would equate to ham cubes you usually see in a cobb salad. This recipe is a great compromise on items you might normally have for a cobb salad versus what you would see in one if you order it at a restaurant.


Easy Cobb Salad
Serves 1

What you Need:

2 Bacon Strips Cooked (Save your bacon grease! ;))
2 Eggs (Size of your choice!)
1/2 - 1 Cup Spinach
1 Roma Tomato Chopped
1 Small Avocado Chopped
1/2 Cucumber Chopped
1/4 Cup Shredded Cheese
Ranch Dressing

Optional:
3 Miniature Pickles (I love Polish Pickles!!! :))
Cholula Sauce
Salt & Pepper to your taste

What you Do:
I cooked the eggs and bacon at the same time on the stove top. The eggs I made over easy because if you like saucy stuff like I do the runny yolk adds to the dressing! Alternatively, you can cook these over hard and cut it into pieces or scramble them and add to the salad.

I suggest using a plate for this salad - I always tend to make a mess if I try to put mine in a bowl and mix it later.

Add all the veggies to your plate, top with the egg and bacon. Lastly add the ranch and if you want more of a pop in flavor cut up some pickles and add cholula sauce. I've also picked up a habit of salt and peppering all my salads. It enhances the flavor okay? ;)

Enjoy the awesome mix of veggies and protein! Man salads make me happy! ^-^ What's your favorite salad?

Thursday, September 4, 2014

Chocolate Flaxseed Bread - Low Carb

Can I just say I love that cocoa is low carb? Per Tablespoon, this chocolate unsweetened powder has 3 g of carbs, and 2 grams of fiber = net carb per Tablespoon of 1. This recipe calls for 6 Tablespoons for the whole kitten caboodle.

And flaxseed meal!? Well, that powerhouse food is 49 grams of carbs and 46 grams of fiber = net carb of 3grams per cup! True story... :)

I find the experience of eating a slice of this bread versus a mini donut of it far more satisfying.
 I hope you like it too!

My husband has been giving me other ideas, to take this recipe to yet another level :). I think it's a recipe for Christmas but if I get antsy I'll get into it to perfect it before then hopefully. LOL Can you wait till Christmas to find out? Maybe I'll move the deadline up to Thanksgiving ;). Maybe...


Chocolate Flaxseed Bread
Pin it for later HERE.

1 cup flax seed meal
1/2 cup unflavored whey protein
1/4 cup Swerve (or 1/4 c Erythritol and 1 tsp stevia glycerite)

6 TBS unsweetened cocoa powder
2 tsp baking powder
1/2 tsp salt

1 c unsweetened vanilla almond milk
2 tsp vanilla extract
4 tbsp butter
2 large eggs, lightly beaten

Options: 
- Add 2 Tablespoons chopped pecans
- Add 2 Tablespoons chopped dark chocolate

What You Do:

1) Mix all dry ingredients.

2) Melt butter in microwave.

3) Add almond milk and vanilla, stir till mixed. 

4) Add melted butter and lightly beaten eggs. Mix well.

5) Let sit for 10 minutes. Preheat oven to 350 degrees.

6) Spray bread pan liberally with coconut oil.

7) After you've let the batter sit for 10 minutes, pour into bread pan.


8) Bake at 350 degrees for 35 - 40 minutes. Once the top of your loaf if firm, it's done.  

Serve warm or cool. 

I've found after slicing the bread, putting butter or peanut butter on top makes them taste pretty awesome! As always, tailor to your diet needs. I do not add nutrition facts to my recipes because looking at the ingredients, etc. is always up to the consumer. :) 

Friday, August 29, 2014

Peanut Butter Cookies - For Low Carbers

Does this happen to you? You're in the kitchen, you decide it's time to make something, one things leads to another and you get this snowball affect of making one recipe after another after another?

That was me, that was me last night. In the end, totally worth it of course! :D I'm finding with the Texas summer heat, during the day is not a good time to bake. Everyone will be feeling the ill affects of a 350 - 400 degree oven and add insult to injury of the heat! But that's okay, where there's a will there's a way... and if you're in the flow you might as well keep on keeping on until you've decided you're done. Amiright?

I made a total of 4 recipes last night. All of which needed to be baked so it was a good thing I started at 8pm. I was done with dishes cleaned and put away well before 11pm. The line up was as follows (and yes, they are linked recipes!! ^-^ You're welcome! :D ;))


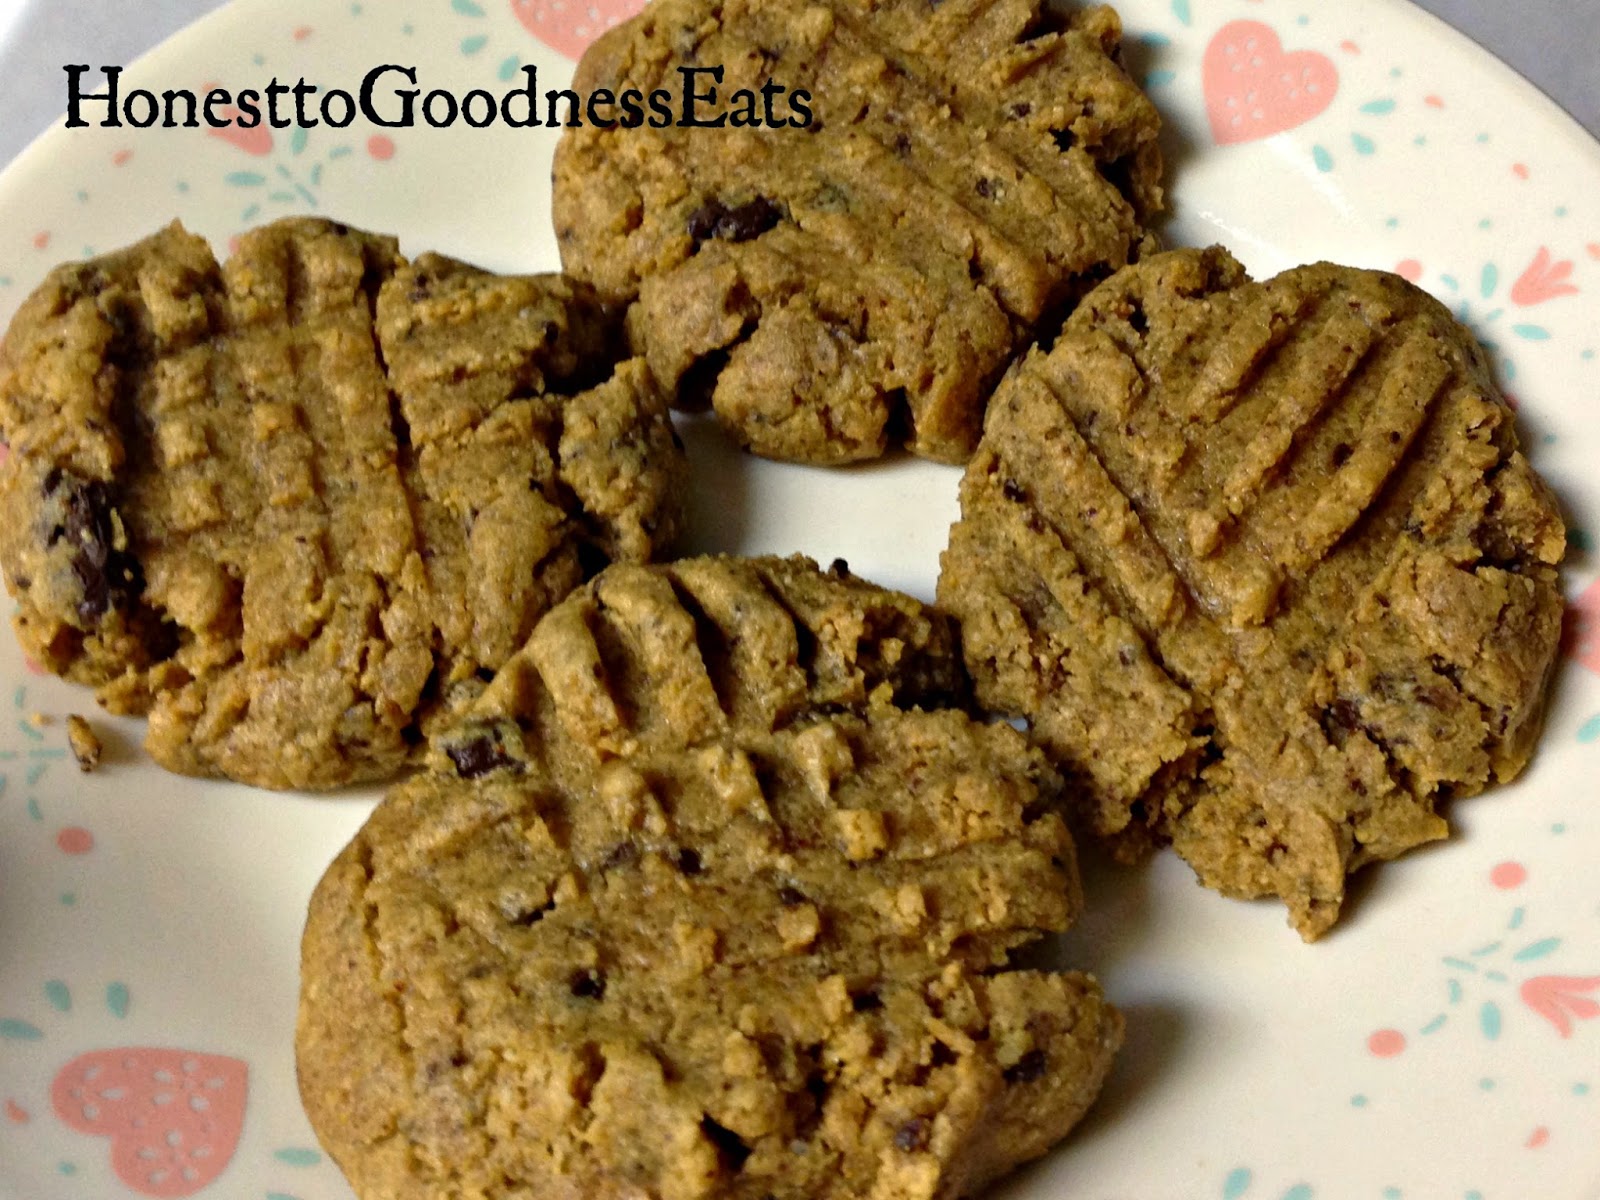
I then decided to play around with a peanut butter cookie recipe. This time I think I struck the right balance (before I wasn't so sure about the salt, I couldn't taste it, I think this was due in part because of the peanut butter I used).

My husband said he thinks these are even better the next day, which is great! :D I will say I'm seeing a trend with him... he tends to like the recipes I make with swerve better when they are cooled off. Food for thought.  ;)

Peanut Butter Cookies
For Low Carbers

Yields about 20 - 24 cookies

What You'll Need:
1 Cup Swerve ( or 1 cup erythritol and 1 tsp stevia)
1 Cup Peanut Butter
1 Cup Peanut Flour
2 Large Eggs
1 Tablespoon Butter
1 Teaspoon Baking Soda
1/2 Teaspoon Salt

Optional: 1/2 Cup Sugar Free Chocolate Chips

What You'll Do:

1) Preheat oven to 350 degrees.
2) In a medium bowl beat together the swerve and peanut butter, mix well. Add the remaining ingredients one at a time mixing after each addition.
3) Roll dough into 1 1/2 inch balls. Place balls on a baking sheet lined with parchment paper. With a fork make criss-cross marks on top of each ball to flatten to about 1/2 inch thickness.
4) Bake 8-10 minutes. Pull cookies out of the oven and let them sit on the pan for a few minutes before moving. They will continue to cook and harden up a bit.

Serve warm or cold. These make a good dessert but could also pass for breakfast - I'm serious! :)

Any and all feed back is welcome! I hope you like these! :D

I couldn't wait to get these out of the oven! 
Taking a photo of them as they cooked felt like the right thing to do. ;)


And as they cooled off... 


Worth noting: Peanut butter flour has 32 grams of carbs per cup, these cookies go down easier than the standard low carb cookies out there that have 1 cup peanut butter,
1 cup substituted sweetener, a few eggs and vanilla. However, the cookies in this recipe, if you ate them all in one sitting, (don't do it! XD) the cup of peanut flour packs 32 grams of carbs - so be careful if you have a strict carb count you are trying to keep :). Granted 32 grams of carbohydrates versus
127 grams that regular flour has, this recipe makes a nice treat in comparison. 

Saturday, August 23, 2014

Bacon Wrapped Chicken with Parmesan

I think you will like this recipe. Pretty sure it will be a go to recipe if you can get past handling chicken ;). This is a hands on recipe and being a crafter, anything hands on is fun for me!
Aside from being fun to make, these are really filling! 


Bacon Wrapped Chicken with Parmesan
Pin it for later here.

Because I was being super productive the other day, not only did I make a 9 x 13 pan of Bacon Wrapped Chicken with Parmesan BUT I made an additional 9 x 9 pan of these and set them in the freezer! I plan to pull them out some morning to let thaw and be cooked later!

Due to me functioning at high efficiency when I put this together, ;) you have options! It really all depends now on how many mouths you need to feed, or what size pan you have clean! :D

What You'll Need:

If you use a 9 x 9 casserole dish: 
Serves 4
4 - 6 Chicken Breasts
4 Tablespoons Parmesan Cheese
1 Tablespoon Black Pepper
1 Tablespoon Garlic Powder
2 Large Eggs Beaten
1 Packet of Bacon

1) Beat the eggs and put them in a shallow dish.
2) On a plate, mix the spices and cheese until combined.
3) Cut each chicken breast diagonally so it resembles a tenderloin size.
4) Wrap the chicken diagonally with the bacon. Dip the bacon wrapped chicken in the beaten egg and then take the whole mess and roll it in the spice mix.
5) Place bacon wrapped chicken in pan and line them up side by side in two rows or however you can get them in the dish.

Bake at 350 degrees for 35 to 40 minutes or until the chicken is done!

Or if you use a 9 x 13 casserole dish:
Serves 6
6 - 8 Chicken Breasts
6 Tablespoons Parmesan Cheese
1 1/2 Tablespoons Black Pepper
1 1/2 Tablespoons Garlic Powder
3 or 4 Large Eggs Beaten
1 packet of Bacon

Follow the directions as listed above on bake 375 for 35 - 40 minutes or until chicken is done!


As I was working this recipe up, one of the eggs I used was not like the others! 
I grabbed my phone and snapped a pic because I hadn't seen one this pointed before and thought you might thing it was cool too! ^-^

Tuesday, August 12, 2014

Low Carb Sausage Pinwheels - These Will Rock Your Socks

This is it my friends! The search for an amazing low carb dough recipe is OVER! Elizabeth Nimphius the creator/writer/chef/mastermind ;) of Uplateanyway.com  foodie blog has hit a gold mine coming up with this recipe (and a BUNCH of others as well I'm sure - check out her blog here!!)!!

I found her through a recipe post on pinterest for some Low Carb blueberry muffins O.O (shocking! amiright?! But they hold so much promise!;)) I'm very excited to make them for my family because the texture Elizabeth was able to bring to life in these sausage rolls without the usual use of white flour is amazing. And I stress... Ah-maze-zing! Mkay!? Since I didn't have the ingredients on hand for the blueberry goodness, I went with the next best thing for breakfast ;). Rest assured I will be making the blueberry muffins and sharing about here. :D
*****


Something worth noting is that Elizabeth tends to use the most economical way to make things. 
For example, she will use cheese over almond flour when she can. 
I have a few foodie friends who will appreciate this because almond flour is pricey!

*****

When I made Elizabeth's Sausage Roll Recipe I managed to miss some important points of the recipe, namely the part about kneading and heating the dough a bit. That's right I *completely* neglected to do that part - but guess what?!?! It was still delicious and the crust was flaky and chewy and delicious! Oh, I already said that, you get the point right? :) This leads me to believe, that had I slowed down and read the recipe and followed it completely, I would have been in for quite a treat!! Of course I will soon find out as I am destined to make this again!!!!! And again!! ^-^

Get the full amazing recipe HERE. P.S. Did I mention these are gluten free as well? Yes.... yes they ARE.

Here are the delicious bites!

Pin it for later HERE.


You'll notice I used aluminium foil to line my pan - DO NOT do this! 
I did not have parchment paper :( so I did what I could with what I had. 
The rolls did not come off the foil without a fight, don't let this happen to you ;). 

Sometimes I call them sausage pinwheels, I've seen them called many different things on pinterest... 
call them whatever you want, but at least make them for your family already and make sure to let Elizabeth from Uplateanyway.com know how good they are so she will make more amazing things! ;).
Enjoy!!!

Saturday, August 2, 2014

Sauteed Onions - Spicy Chicken Breast Side Dish

This is a spin off from the Spicy Chicken Breast recipe ... because I made the chicken breasts AGAIN for my family tonight! :D As I was cooking the first batch of chicken breasts I recalled the sad looking onion in the pantry and decided I would make it our side dish. I'm glad I did! Look at these caramelized beauties!


All I did was cook up the chicken per the recipe I shared here, once I pulled the chicken out of the pan, I then cut up a medium/large onion and tossed it in. I covered the pan and stirred occasionally until the onions were slightly translucent. Voila! Super easy side dish for the spicy chicken... and now I'm thinkin cottage cheese would complete this meal... Huzzah! Aren't culinary arts exciting?! :D

Thursday, July 31, 2014

Spicy Chicken Breast Recipe - Great for Grilling!

Hello friends! I know I have been quiet for a bit now, my family and I moved halfway across the country from Virginia to Texas and are trying to get settled in! Many people ask, why we moved and to put it simply, we moved to live. :) In February we visited Texas for about a week and really feel in love with the views, the weather, the people, the pace and the quality of life out here. After we got back to Virginia we took steps to get a job lined up for my husband and get our house sold so we could trek out here! :) It's been quite an adventure I assure you! Initially when we got to Texas, we were living in an extended stay hotel for about two weeks while waiting for our rental house to be ready for us. During that time cooking was nonexistent. Now we are renting a home as we lot and floor plan shop to get started building a home! Late last week I unpacked the last few boxes of kitchen supplies and am happy to be cooking again! As my husband put it, my kitchen is like my office - I do a lot of my work there. :D Does this guy know me or what?! ;) Along with getting settled into our new place until we have ours built, I've discovered Costco O.O ...and have since gotten a membership! I scored some 40 frozen 1/4 lb hamburgers and we've been chowing on those. Most of the last week we ate hamburgers made on lean mean grilling machines (anyone remember those? They are awesome for indoor grilling! Just sayin ;)), which have been tasty but lacked creativity. I also had scored a 5 lb bag of chicken breasts from a Wal-mart not terribly long ago and today I decided it was time to change up our hamburger and side salad routine and toss some chicken in the mix!

This recipe is super simple, not much of a laundry list for ingredients but packs a punch (in your mouth!). Also, be forewarned, as you cook these bad boys, the pepper oils might get caught in your throat and cause you to cough (they did for both myself and my sister!). This is just a prelude to the deliciousness that you are about to experience once you get one of them to your plate and cut into a bite size piece for your mouths enjoyment! :)

This recipe would take the cake at any barbecue.. I can't wait to get these on the grill... but for now, I had them in a pan! Over medium high heat!! :D


Spicy Chicken Breast Recipe
Serves 5 - 8

If you're cooking, you'll want to oil the pan with this:
- 4 Tablespoons butter (or bacon grease!)

If you're grilling, omit the butter or bacon grease and put them straight on those grill grates!

For the seasonings... get to mixing these ingredients... in a bowl...

- 2 1/2 Tablespoons paprika
- 2 Tablespoons garlic powder
- 1 Tablespoon salt
- 1 Tablespoon onion powder
- 1 Tablespoon ground mustard
- 1 Tablespoon ground cayenne pepper
- 1 Tablespoon ground black pepper

Also, have this on hand:

8-10 medium sized chicken breasts, each 4 to 6 oz pieces

Place the dry mix on a plate and put each chicken breast into the mix, coating both sides.

Cook or grill each chicken breast for about 3 - 5 minutes each side, until the pink in the middle is gone.

While cooking, be sure to cover the chicken to help keep in the moisture. If the pan gets too hot and starts to blacken, add a bit of water, reduce the temperature and cover it. Before you know it, you'll have delicious chicken breasts!

If you have leftovers (though I can't imagine you would ;)) this chicken would be excellent cut up on top of a salad! But don't take my word for it! ;)

Also - if you are wondering what to side to serve, might I recommend sauteing onions? See pictures and more description here.

Chicken Breast recipe adapted from Allrecipes.com

Wednesday, June 11, 2014

Chicken Stir Fry using Broccoli Slaw - Low Carb Recipe

As I continue my quest to make this blog a hub for recipes that are tried and true favorite for my family, 
I am glad to be adding another recipe with peanut butter and chicken! :) 

This recipe packs a little bit of heat and a bit of an ethnic flavor due to the ground ginger. 
Depending on your palette you might like less or more of the ginger and or/red pepper flakes.  
In the end though, I hope you and yours enjoy this recipe!


Chicken Stir Fry - Low Carb Recipe

What you'll need:
6-7 chicken tenderloins OR 4 chicken breasts cut into 1/2 - 1 inch cubes
2 Tablespoons Bacon Grease
1 Tablespoon Ginger 
1/4 Cup & 2 Tablespoons Gluten Free Soy Sauce (Tamari)
1/2 cup chicken broth
1/2 cup water
1 Teaspoon Onion Powder
1/2 Teaspoon Garlic Powder
1 Teaspoon Red Pepper Flakes
1 Tablespoon Swerve (or 3 packets Truvia)
1/2 Teaspoon xanthan gum
2 bags of broccoli slaw mix
Natural Peanut Butter to top it off! :) 


What you'll do: 

1) In a medium large pan over medium heat add bacon grease, chicken & ginger.

2) Once all sides of the chicken pieces have been browned, add the rest of the ingredients except the broccoli slaw. Stir well. 

3) Once the ingredients have been mixed well add the broccoli slaw and fold the other ingredients into it until mixed thoroughly. 

4) Simmer for about 10 minutes stirring occasionally. Serve warm and top with peanut butter if desired.


Sunday, June 8, 2014

Chocolate Flaxseed Mini Donuts - Low Carb Recipe

No really, you make this with the right ingredients and you're money. 
The cocoa and the flax seed and the whey and the butter.. you're set. It's all low carb. That's right :). 
 My father in law has Type II diabetes and  is staying with us now, so I'm trying to make some "regular" food for him and the family to have low carb options. The first week he's been with us he said his blood sugar has come down since staying with us... and he said he thinks it's because of these muffins. ;0)

 This recipe was adapted from MariaMindBody's recipe


Chocolate Flax Seed Mini Donuts

What You'll Need:

1 cup flax seed meal
1/2 cup unflavored whey protein
1/4 cup Swerve (or 1/4 c Erythritol and 1 tsp stevia glycerite)

6 TBS unsweetened cocoa powder
2 tsp baking powder
1/2 tsp salt

1 c unsweetened vanilla almond milk
2 tsp vanilla extract
4 tbsp butter
2 large eggs, lightly beaten

Options: 
- Add 2 Tablespoons chopped pecans
- Add 2 Tablespoons chopped dark chocolate

What You Do:

1) Mix all dry ingredients.

2) Melt butter in microwave

3) Add almond milk and vanilla, stir till mixed. 

4) Add melted butter and lightly beaten eggs. Mix well

5) Let sit for 5 minutes. 

6) Spray each donut mold with coconut oil.

7) Spoon batter carefully into mini donut tin, bake 20 - 23 minutes at 350 degrees. 

Serve warm or cool. 

I've found topping these with peanut butter makes them taste pretty awesome! I also found unsalted butter is tasty as a topping as well. Just throwing those options out there. :) As always, tailor to your diet needs. I do not add nutrition facts to my recipes because looking at the ingredients, etc. is always up to the consumer. :)